Laying laminate
LOGOCLIC® laminate is quick and easy to lay thanks to the simple clic system. Tongue and groove are simply clicked into one another until the floor is finished. Unlike with parquet flooring, there is no need for gluing because laminate is laid floating. Nevertheless, there are a few points to be heeded during laying.
Instructions in 10 steps
The step before laying laminate
- Preparation
Before you start laying laminate, please always read the laying plan in the PDF manual. Follow the instructions in the manual exactly to retain full warranty and guarantee rights. - Check the panels for faults under good lighting conditions – warranty claims cannot be made if the panels have already been processed.
- Before installation, store the laminate panels for 48 hours under the same climatic conditions as for laying.
- To avoid storage damage to the panels such as bending, place the laminate floorboards in their original packaging horizontally on the floor. The room should have a temperature of at least 18°C and an air humidity of 50-70%.
- We recommend sorting the panels before laying according to required grain pattern and possible nuances of colour.
- Please note that laminate flooring is not suitable for wet areas such as bathrooms and saunas! The vinyl floor elementPro is suitable for use in wet areas.
LOGOCLIC® is almost scratch-, imprint- and wear-resistant.
enjoy the natural look and feel of the laminate flooring.
straightforward flooring from laying through to maintenance.
aminate offers no place for dust and thus dust mites.
UV-resistant – sunlight does not cause discolouration.
laminate flooring from LOGOCLIC® is flame retardant.
Step 1 - Vapour barrier film
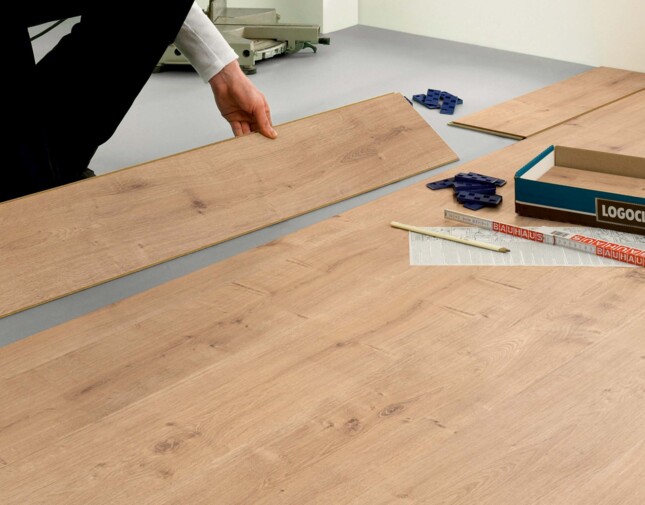
Before laying laminate on mineral substrates (e.g. anhydrite screed or concrete screed) and over underfloor heating systems, it is essential to install a suitable vapour barrier film to protect the laminate against moisture. We recommend using PE film for laminate for this purpose. Allow the lengths to overlap by 20 cm and fix in place using adhesive tape (e.g. aluminium adhesive tape for vapour barrier).
Please note: PE film must not be laid on top of wooden subfloor!
Step 2 - Impact sound insulation
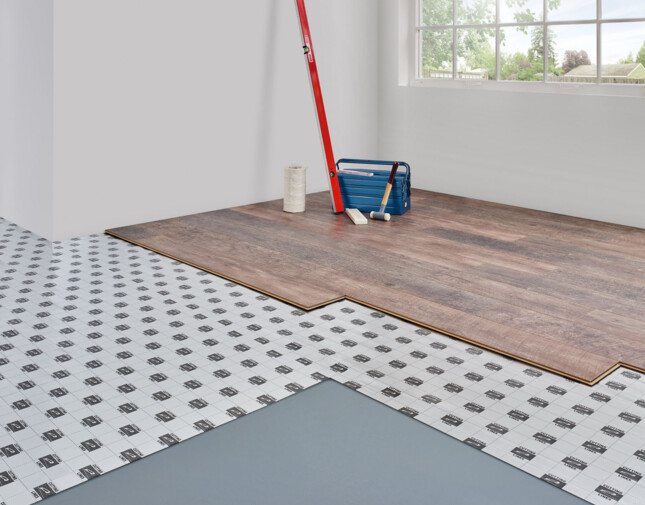
Use impact sound installation to reduce noise. A PE foam film or other suitable underlay can be chosen for this. Diagonal laying in the opposite direction to the panels is ideal.
Step 3 - Measure the room and cut the panels to size
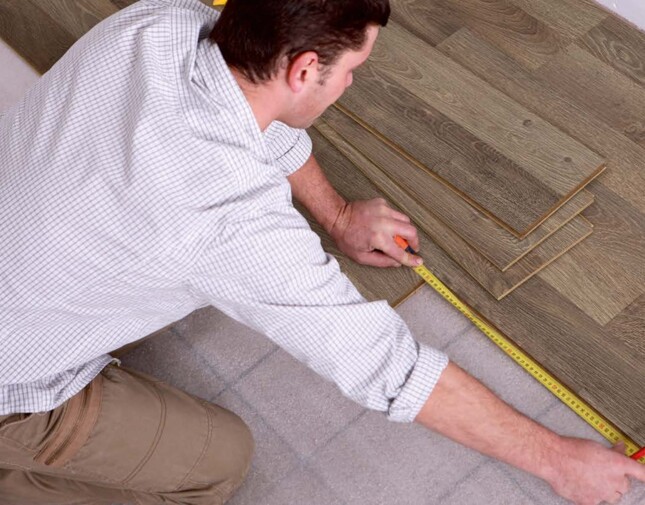
If walls are not straight, transfer the outline of the wall to the first row of panels using a pencil and saw the panels accordingly. Measure the depth of the room before laying the laminate. If the last row of panels has a width of less than 5cm, you must divide the remaining dimension evenly between the first and last row of panels, so that both rows are cut to size with the same panel width.
Always maintain a 12-15mm spacing to walls, heating pipes, pillars, door stoppers etc., which you must fix using spacer wedges.
Expansion joints (min. 2cm width) are required when laying laminate flooring longer or wider than 8m. Please bear this in mind if you wish to lay laminate across several rooms as well. Here, the panels must be interrupted in the area of the door frames. The expansion joints can be covered professionally with suitable profiles.
Recommendation: lay the panels lengthwise to the main source of light.
Step 4 - First steps for laying laminate
Start laying in the left corner of the room or in the corner of the room that has the smallest angle. Place the first panel with the tongue side to the wall and secure the spacing to the wall using a spacer. Lay the other panels in the specified order. (see video)
Step 5 - Lay the second row of panels
The second row is started with half a panel or the piece left over from the first row.
Insert the long tongue side at an angle of 30° into the lower groove cheek of the panels already laid and turn into place downwards exerting slight pressure. Once flat, the horizontal joints between the panels are closed using a hammer and tapping block. This is particularly easy thanks to manufacturing with transition fit. The panels should click in without any problems.
Step 6 - Lay further panels
Tip! Generally, place the installation aid (panel section with longitudinal tongue profile) on the longitudinal side at the level of the two end joints. This prevents damage while locking the panels. In the case of gluing/sealing, apply sufficient white glue of the type D3 or Clickguard™ to the upper tongue cheek.
After approx. 10 minutes, when the glue has dried a little, slide any excess glue off using a plastic spatula.
Residues should be removed completely using glue remover, a scratch-free pad or clear warm water. When using Clickguard™, work according to the instructions for use.
Step 7 - Lay laminate around heating pipes
It is necessary to cut out holes 3 cm larger than the pipe diameter for installation around heating pipes. Saw out a V-shaped “fitting piece”, glue, fit and fix it in place with a wedge until the glue has hardened. Then cover the cut-outs with radiator collars.
Step 8 - Lay laminate between doors
Shorten the wooden door frame so that a laminate panel and impact sound installation fit underneath. Please ensure that the laminate flooring can expand without any problems in the event of fluctuation in climatic conditions.
Step 9 - Lay the last row of panels
Turn the last panel in the row through 180° (i.e. upside down) to for measuring to size, place the decor side upwards next to the existing row (groove cheek to groove cheek) and wall side. Take the edge spacing into account at the end. Mark the panel width and cut to size. To avoid splintering edges, the decor side should be facing downwards when an electric jig saw or portable circular saws are used. Otherwise saw off from the top of the panel.
Fit the last row of panels using the pull iron. From the third row onwards, laying as shown in the figure. Start each new row with the leftover piece (at least 20cm long) from the previous row. The horizontal joint offset from one panel row to the next should be at least 40cm.
Fit the last row of panels carefully. The end joints of the last row are joined together using the narrow side of the tapping block if the panel width is small. After laying, remove the spacer wedges.
Step 10 - Set the skirting boards
For a perfect finish, fix the skirting board clamps at intervals of 40-50cm on the wall and attach the skirting boards having cut them to size first.
Laying with 1clic2go Pure
Instructions for laying laminate with 1clic2go Pure system
- Place the first panel with the tongue side facing the wall. Clic the second panel into the end of the first panel
- Start the second row with half a panel or the piece left over from the 1st row
- Position the panel piece of the second row in such a way that the long sides of the panels in the 1st and 2nd rows are lying parallel to one another but are not clicked in place. Before clicking in place, position further panels to the end of the 2nd row
- Once the complete 2nd row is in place next to the 1st row, lift this by about 2 centimetres on the left-hand side
- In the raised area, the tongue of the panels in the 2nd row slides into the groove of the 1st row
- Repeat this procedure along the entire 2nd row
Download the 1clic2go Pure laying instructions

Check list – what you need for laying laminate
- Impact sound underlay
- Polyethylene film (PE-film for short)
- Spacer wedges
- Tapping block
- Installation aid
- Pull iron
- Saw
- Hammer (min. 300 g)
- Pencil
- Yardstick
- If necessary: Clickguard™
- White glue D3
- Joint sealing compound

Working time
The working time required for laying laminate depends on various factors:
- Experience in laying laminate
- Room layout
- Number of doors and radiators
- Number of helping hands
To lay laminate alone in a room approx. 20 m² in size, you should plan around 8 hours.
Laying the impact sound insulation: approx. 1h
Laying and cutting the laminate flooring to size: approx. 5h
Adapting to door frames and heating pipes: approx. 20-30 minutes per installation point.
With some practice and a helper for cutting and handing you the panels, working time can be considerably reduced.
Laminate laying possibilities
There are three laying possibilities, depending on the application area:
- Glueless and fast laying.
- Laying with Clickguard™: If you wish the floor to be protected long-term against swelling caused by moisture penetration from above caused by spilling, for example, you should seal the laminate joints using Clickguard™. The laminate can then be taken up and laid again.
- Laying with glue also ensures permanent protection against moisture, but the work is more time-consuming, and it can no longer be removed for a possible second laying of the floor.
Important points
Substrate: The subfloor must be level, dry, clean and capable of bearing loads. Level out any unevenness in the floor of more than 3mm over 1m in a professional way.
- When laying laminate on mineral substrates such as concrete, cement screed, anhydrite screed and stone tiles, etc., a measurement of moisture must be carried out.
- The following residual humidity of the screed must not be exceeded: cement screed; with underfloor heating < 1.8% CM; without underfloor heating < 2.0% CM anhydrite screed; with underfloor heating < 0.3% CM; without underfloor heating < 0.5% CM
- Carpet is not a suitable underlay and must therefore be removed before laminate flooring is laid!
Also good to know when laying laminate
- Underfloor heating: if you lay laminate on underfloor heating, heat this according to protocol first. You will find more information about this under laminate on underfloor heating.
- Floating laying: laminate flooring is laid floating and must not be glued, nailed or fixed in any other way (e.g. by door stopper!) to the subfloor!
- Profiles and skirting boards: provide an attractive finish after the laminate flooring has been laid, conceal transitions, expansion joints and the wall gap using matching skirting boards and profiles.
An additional insulating underlay is not permitted with products with an integrated footfall and impact sound insulation. This affects the LOGOCLIC® product groups Ambienta and Silentos. With these products step 2 of the instructions is not applicable.
Can I lay the laminate through the doorway?
No, it is not advisable when laying laminate to “lay the floor through” between two rooms and thus over a doorstep. This is because the laminate swells and shrinks in different ways due to different temperatures and different humidity levels in the individual rooms. It is therefore advisable to leave an expansion gap between the rooms and in the area of the door.
To conceal and bridge this expansion joint, there are profiles of various types and skirtings for the wall gap.
Can I lay laminate on underfloor heating?
Yes. Due to the high material density, laminate is ideally suited for installation on hot water heating systems. Laminate has optimal thermal conductivity. The heat from the underfloor heating can easily pass through the material and is absorbed very little.
As hot water underfloor heating systems are laid in a screed bed, it is important to carry out a moisture test first and then heat-up according to protocol before laying the laminate.
Can I cut laminate with integrated impact sound insulation using a laminate cutter?
The Ambienta product line from LOGOCLIC® impresses with its integrated impact sound insulation, for example. But despite this additional feature, you can easily process laminate from the Ambienta range with the laminate cutter. The impact sound insulation does not make it at all difficult for you to cut the laminate flooring.
This means that Ambienta laminate is also easy to install – just like other product lines from the LOGOCLIC® brand. And many more advantages await you with laminate flooring from LOGOCLIC®
Can I lay laminate on stairs?
Are the stairs in your house or flat worn? Or do you simply want to do a bit of DIY again and give your staircase a new look? Laminate can also be laid on stairs – you have a choice of different decors. To finish off the edges visually and protect them from wear and tear, there are special stair profiles that can be attached quickly and easily using screws or glue.
What needs to be taken into account for the direction in which laminate is laid?
The direction in which laminate is laid refers to the orientation of the individual panels in relation to the walls.
- Longitudinal direction means alignment parallel to the long side of the room.
- Transverse direction is parallel to the short side of the room.
- Diagonal describes alignments that are not at right angles to a wall.
Since there is a lot of work involved in laying laminate and you want to enjoy your floor for a long time, you should consider in advance how you want to lay the floor.
Do I also have to keep edge spacing for the pipes that run through my laminate at the edge?
Laminate flooring from LOGOCLIC® consists of around 90 percent wood-based materials. This means the floor may swell or shrink over time due to changing temperature and humidity – in other words, the floor expands or contracts. If it expands, the result can be an unsightly ripple in the floor. To avoid this, you should keep an edge spacing from adjacent solid objects as well as from the wall.
As a rule of thumb it can be said that the clearance should be about the same size as the material thickness. With laminate flooring from LOGOCLIC® a clearance of about 12 to 15 mm is recommended.
Why an expansion joint for laminate?
Expansion joints are often also known as movement joints or dilatation joints. They are used to compensate for any swelling or shrinking behaviour of laminate flooring in larger floor areas. Coverings such as parquet or laminate can expand (swell) or contract (shrink) with temperature fluctuations or changes in humidity. These possible changes are compensated for by an expansion joint at door jambs, room transitions or to the wall. The expansion joint is approximately the thickness of the material – ideally around 12 millimetres.
For particularly large laminate areas – for example, from a length or width of eight metres – an additional expansion joint should be planned in the middle of the room to prevent the formation of ripples here.
Learn more about laminate properties.
We want to lay laminate flooring on wooden floorboards. Which underlay do we use?
In order to lay laminate flooring on old wooden floorboards, there are a few things to bear in mind: As a general rule, polyethylene film should not be used as an intermediate layer, as there must be an exchange of moisture between the laminate flooring and the old floorboards.
You should also take any unevenness in the subfloor into account. This can be evened out with a thicker underlay mat, such as XPS Maxima or special wood fibre boards. At LOGOCLIC® you will find different underlays such as impact sound insulation, vapour barrier or thermal insulation. Some products are true all-rounders.
Are special tools required for laying laminate?
No. At LOGOCLIC® you will find laminate that can be laid quickly and easily using the Clic system. Nevertheless, for a smooth laminate installation it is important to have suitable tools ready. You need:
- Tapping block
- Pull iron
- Hammer
- Saw (ideal: jig saw)
- Glue
- Yardstick/tape measure
- Angle
- Pencil
- Drill for the skirting boards
- Aluminium adhesive tape for the vapour barrier
- Carpet/cutting blade for the PE film and impact sound insulation
How do I lay laminate at a crooked wall?
Unfortunately, not every room has only right-angled corners. Laying laminate on sloping walls does require a little skill, but with the right technique it can be mastered even by amateur DIY-ers. As a rule, only one wall in the room is sloping, which also creates only one acute angle. It is important to start laying at the smallest corner (most acute angle). Otherwise the last panels will be very difficult to place.
When walls are crooked, there are always two laying directions available:
- The panels are aligned with the end (short side) facing the crooked wall
- The panels are aligned with the side (long side) facing the crooked wall
Learn more about laying laminate.
How do I close the gap between laminate and door frame?
When laminate flooring is being laid, the door frame is often an obstacle that needs to be overcome. Yet what is the best way to do this?
Door frames made of wood: On level with the laminate, cut off the door frame together with the insulation. To measure, it is best to use a piece of section of the laminate and saw off the door frame along the panel, for example, with a plunge saw.
Steel door frames: With steel door frames, you have little chance with a saw. In this case, a recess must be cut in the laminate panel. When doing this, allow a clearance of approximately the thickness of the material – for LOGOCLIC® laminate flooring this means a clearance of around 8 to 15 millimetres.
Any gaps between the door frame and the laminate flooring can be sealed with acrylic – and your floor is protected and the transition is clean.
Do I have to pre-store the laminate before laying it?
Yes. Laminate of the LOGOCLIC® brand is made up to 90 percent from wood-based materials. Laminate flooring thus has the same typical material properties as real wood. This means that the material adapts to the humidity of its environment.Be sure to adjust the laminate flooring to the room climate before laying and store the material for 48 hours before laying in the room where it will be used later.
What needs to be taken into account for wall gap?
Laminate is a wood-based material, the volume of which increases under the influence of moisture and decreases in a dry environment – this is known as swelling and shrinkage. This is why it is essential to maintain a clearance from the wall when laying the laminate.
The clearance should ideally be between 12 and 15 mm; at least the thickness of the material.
What do I need to look out for on the subfloor before laying?
Nowadays, laying laminate flooring is so easy that you no longer need a professional craftsman to do it. But before you start laying it, you need to make sure that the subfloor is suitable. The three requirements for the subfloor are evenness, stability and moisture. These are the suitable substrates for laminate flooring:
- mineral substrates (such as screed, concrete, asphalt)
- chipboard structures
- wooden floorboards
- old substrates with existing hard coverings (stone, ceramic, PVC)
Can I lay laminate on carpet?
To lay laminate flooring, you need a suitable subfloor. It should be stable, even and dry. Therefore, you must make sure that the subfloor meets these requirements before laying the floor. For these reasons, carpet is not a suitable subfloor for laying laminate on. The soft fabric would have too little pressure stability. Hygiene is another reason to remove the carpet or rug before laying laminate.
